Have you ever moved a Drupal-powered website? Say you have upgraded to better Drupal web hosting. Compared to a static website, the addition of a database, webserver configuration issues, and permissions issues can make the moving process difficult. If you’ve ever started the process of moving a Drupal site, only to be met with a blank page – a.k.a the white screen of death (WSOD) on the new server, you know how frustrating things can get.
Why move a website? There are often good reasons to do so. You might find the performance of a different hosting provider compelling. Maybe you want a second version of the website on a separate hosting account as a staging server. You might even want to host the website on your own server.
It’s a daunting task, but with some preparation, most Drupal-powered small business websites can be moved in a half day, with minimal surprises, by anyone with a basic understanding of web tools and terminology. It’s all about preparedness. If you’re thinking about moving your Drupal website to a new server, the best way to avoid unnecessary drama is to ensure the following:
- Understand the key web hosting terminology that will help you communicate with more technical people, talk to hosting companies in terminology they understand, even troubleshoot via search engines, should it come to that.
- Before starting, make sure you have the access you need to all of the important accounts that are part of a hosting move. If you don’t, you’ll get stuck part way through the process.
- Get the right tools to help you move files and back up your database, so you have a local copy of everything, allowing you to leave your live site alone until you’re ready for the final switch over.
- Be sure you always have at least one untouched backup copy of your site files and database. This is critical for you to recover in case something does not go smoothly.
Before we get started, understand that there are many ways to solve a problem like this. If you know how to use the Linux command line, and have SSH access to both servers, you probably have stopped reading this article already. What follows is a method for solving this common problem of moving sites, using tools that are readily available and relatively easily understood.
Important concept: There are three kinds of accounts covered in this article, often lumped together under the single heading “web hosting”. They are: domain registrar accounts, DNS hosting accounts, and web hosting accounts. These will be discussed in further detail below. For now, understand that they are 3 independent things that are probably bundled together by your domain registrar – but they don’t have to be. This gives you the freedom to chose to host your website wherever you please.
Steps to Move Your Drupal-Powered Website
Step 1: Obtain Access to your Domain Registrar Account
Obtain the login URL, username and password for your domain registrar account.
Your domain registrar is the organization you pay annually for your website domain reservation. It’s often the same company you use for DNS hosting and web hosting. Namecheap, eNom, Network Solutions, Tucows, GoDaddy, and Melbourne IT are all domain registrars.
The domain registrar account serves two important purposes: 1. it reserves the domain for your company, and 2. it allows you to manage DNS servers for that domain. Frequently, the registrar also offers DNS hosting services and web hosting services. These three types of hosting are typically bundled together by large domain registrars. It might feel like domain registry services, DNS hosting and web hosting services must be tied together, but they are indeed separate.
In other words, you can leave your domain registered with one organization, host your DNS with a second, and host your website on your own server, or on servers from a better hosting company (recommended, as cheap hosting is often of insufficient quality for business sites). Many specialist hosting companies don’t handle domain registrations at all. To move your Drupal website to a new host, you must be able to log in to this account in order to point at a new hosting provider.
It is wise to maintain control over your domain registrar account. If anything ever happens with one of your hosting providers, you are in control of the situation, provided you are in control of the domain registrar account.
Step 2: Obtain Access to Your DNS Account
This step is going to be easy for most of you. As mentioned in Step 1, the majority of domain registrar accounts also serve as
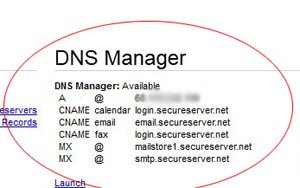
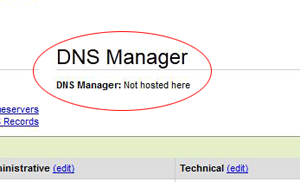
Log in to your domain registrar account. Navigate to your list of domains. Click on the domain you want to move and view its DNS settings. You will find either the DNS is hosted locally, or it’s hosted elsewhere. If it’s hosted locally, you’re in good shape. You’ll come back to this screen later and make edits to two A records (@ and www) when you’re ready to point your domain at your new server. Do nothing for now. Take care to not make any changes to MX records or other DNS records. It’s recommended you take a screen cap of the settings before you start, so you can refer to it should anything go wrong.
If your DNS appears to not be hosted locally by the domain registrar, things are only marginally more difficult. You must 
Step 3. Back Up Your Current Database

Drupal 6 users: Log in to your Drupal site. Click on Administer > Site Building > Modules and look for “Backup and Migrate”. Ensure Backup and Migrate is enabled.
Drupal 7 users: Log in to your Drupal site. Click on Modules and look for “Backup and Migrate”. Ensure it is enabled.
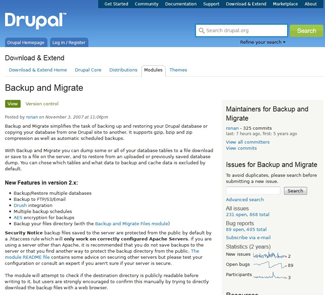
If you are unable to find Backup and Migrate, you must install it. This is a a widely used, safe module. According to statistics on the module home page, it has been downloaded more than 850,000 times, and is in active use on more than 200,000 websites today.
- Visit the Backup and Migrate module’s home page:
http://drupal.org/project/backup_migrate.
For more information on installing modules, visit:
- Installing Drupal 6 Modules
http://drupal.org/documentation/install/modules-themes/modules-5-6 - Installing Drupal 7 Modules
http://drupal.org/documentation/install/modules-themes/modules-7
Follow the instructions included with the module and create a backup of your database. Use default settings. Download the backup to your local computer.
You are now at a point where you have the credentials necessary to repoint your website when ready. You have discovered whether your DNS is local to your domain registrar, or with some third party (if so, you’ve obtained credentials for your DNS host). Finally, you’ve created a local copy of your website database on your computer.
In Part 2 we’ll create a local copy of your website files, and discover a way move your website to your new hosting provider and test it, without affecting the live version of your website.
